


 Create Schedule

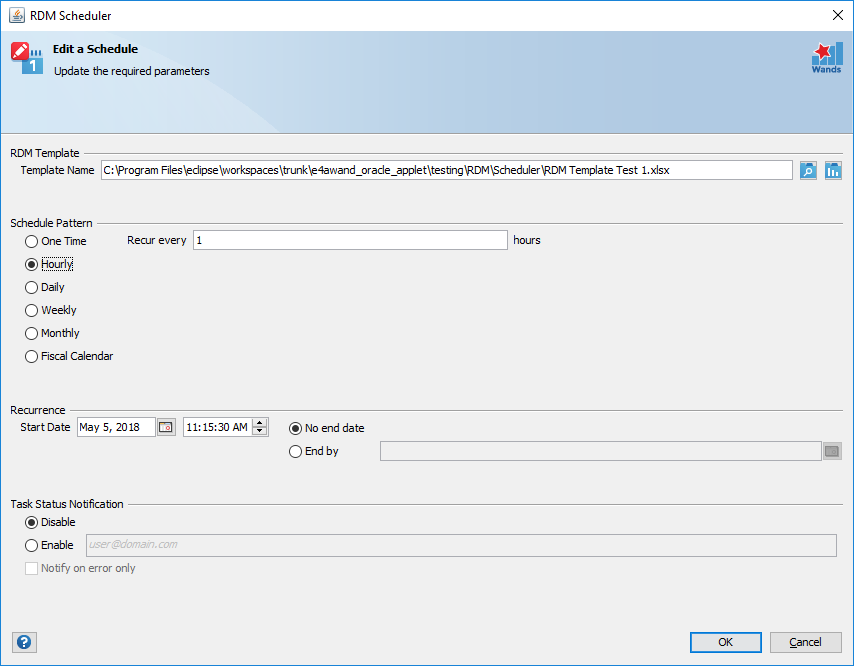
To schedule a RDM template, navigate to RDM | Scheduler | Create. You will be presented with a form to help create the template.

RDM Template
Select the RDM Template you would like to schedule by clicking on the file navigation ![]() or Shared Templates Drive
or Shared Templates Drive ![]() icon.
icon.

Your RDM template must have valid RDM data on each sheet in the workbook otherwise an error will occur when the scheduler runs.
Schedule Pattern
You can choose to schedule the RDM Template one time, or on an Hourly, daily, weekly, or monthly schedule:
- If you select the One time radio button, you choose a date and time to run the RDM Template.
- If you select the Hourly radio button, you choose the recurrence interval for the job and the date and time to start the RDM Template. An interval of 1 produces an hourly schedule and an interval of 2 produces an every other hour schedule. The task will start at the specified time according to the increments of recurring hours.
- If you select the Daily radio button, you choose the recurrence interval for the job and the date and time to start the RDM Template. An interval of 1 produces a daily schedule and an interval of 2 produces an every other day schedule. The task will start at the specified time each day.
- If you select the Weekly radio button, you choose the recurrence interval for the task, the date and time to start the task, and the days of the week in which to start the RDM Template. An interval of 1 produces a weekly schedule and an interval of 2 produces an every other week schedule. The task will start at the specified time on each of the specified days.
- If you select the Monthly radio button, you choose the months in which you want to start the task and the days of the months and the days of the week for each month in which you want to start the RDM Template. You can also specify that you want to start the RDM Template on the last day of each month.
- If you select the Fiscal Calendar radio button (only available on certain configurations), you choose the Calendar and then the corresponding Periods in which you want to start the task. For each fiscal period choose either the Days of the period or On specific days of the week for each period in which you want to start the RDM Template. Additionally you can specify that you want to start the RDM Template from the last day to the fifth last of each period.
The calendar and associated periods must already be defined in your system and be available under the Period functions in GL Wand.
Recurrence
Set the start date and time for the task, you can optionally set an end date for your schedule that will cause the schedule to expire, when a job is expired, the RDM Template will not run.
Task Status Notification
You can choose to receive an email notification on the completion of a scheduled task, enter multiple email addresses separated by a “;” or a “,”. If you wish to only be notified when a task completes with an error, set the “Notify on error only” check box.
The Task Status Notification requires that the user has completed the RDM User Options email settings. Please confirm your settings by selecting the Options menu from the RDM Tools ribbon.
You can now click Create and a new workbook containing the RDM Scheduler template will be created.
RDM Scheduler Template
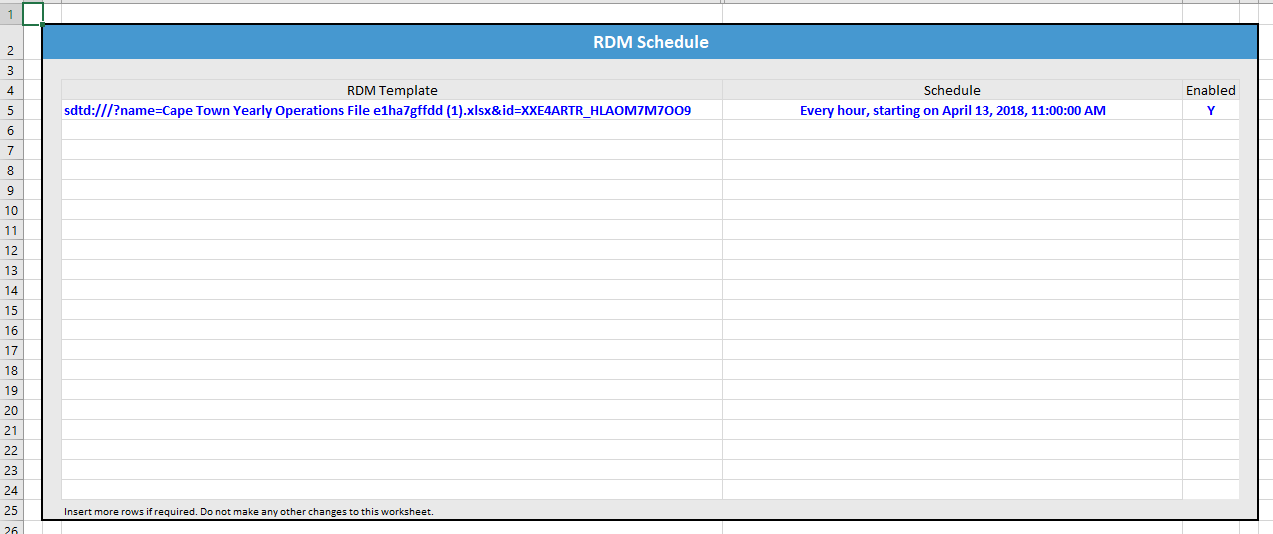
This is a normal Excel workbook. However the structure must not be changed. The only changes that you may make to this workbook are to insert more lines. Any other changes will most likely corrupt the definition and Report Distribution Manager will give an error when you try to run the scheduler.
The RDM Scheduler template has three visible columns, RDM Template, Schedule and Enabled:
- The RDM Template column displays the absolute path and name or the link (if RDM Template is selected from Shared Template Drive) of the RDM Template associated with the schedule job.
- The Schedule column holds only a text description of the schedule and will change in accordance with modifications to the schedule.
- The Enabled column allows you to enable or disable the schedule job. A job that is enabled can run, a job that is disabled will not be scheduled and cannot run until it is enabled.
Edit Schedule
![]()
You can modify a schedule by double clicking the row or by selecting the row you wish to edit, then navigate to RDM | Scheduler and select the Edit icon.
Run The Scheduler
![]()
Once you have created your schedule your are ready to run the scheduler.